There are 2 sets of photos we need from you before we can begin working on your suit. Feel free to send more than the 8 photos we ask for if you aren't sure! Once you have all the photos, please email them to [email protected]
This easy to follow instructional video below will guide you through the process. Or alternatively you can read the instructions further down the page.
3 x Progress Photos
Progress photos show us your overall look so that we create the perfect suit that compliments your physique. We need photos showing front, side and back views. These photos show your current physical condition which help us determine the best cut to compliment your body type.
6 x Measurement Photos
The Muscle Dazzle tailoring team will also need to know your measurements. To make things easier for you, simply hold the measuring tape against yourself and take a photograph. This way, you don't need to worry about reading measurements from the tape correctly - instead, simply follow the instructions below...
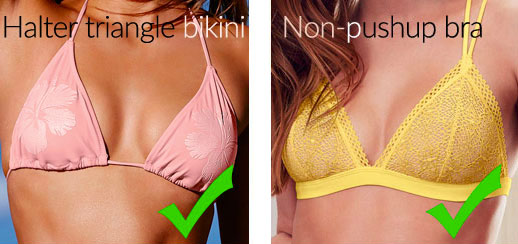
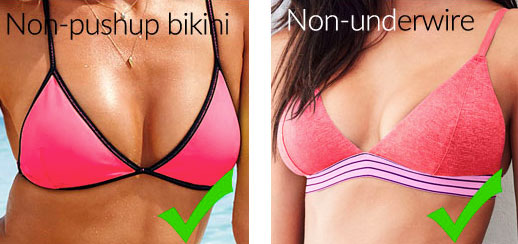
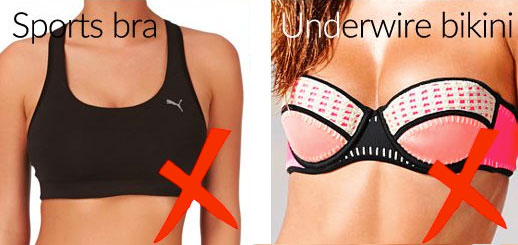
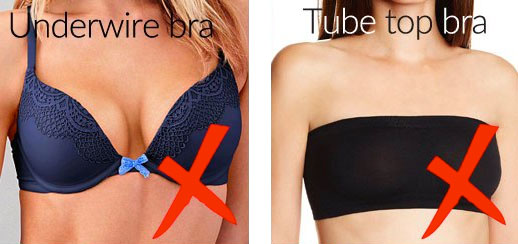
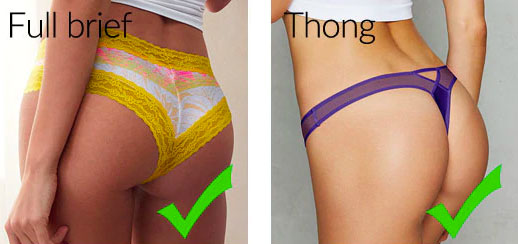
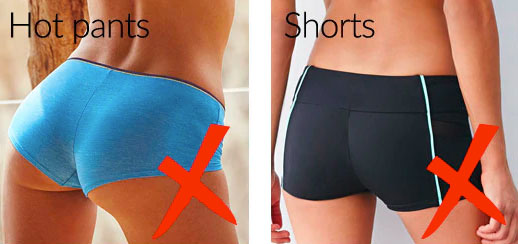
Before we start, what to wear?
We request that you wear only certain types of bikinis or bras for 3 main reasons:
- What you wear should show separations of your body parts you are measuring and that your body type can be seen as accurately as possible.
- Some bikini tops and most bras are made to provide lift and enhancement, so wearing them could give us the wrong idea of your actual bust size.
- The thickness and style of some tops can lead to inaccurate measurements.
The 3 Progress Photos
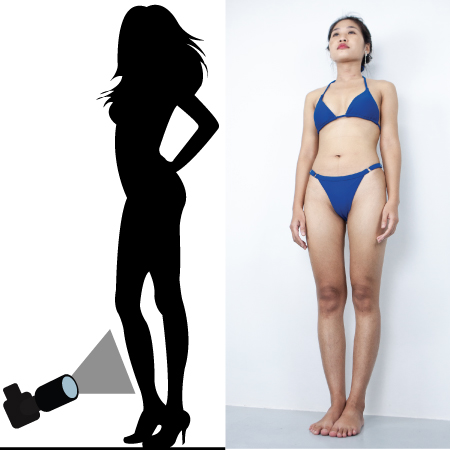
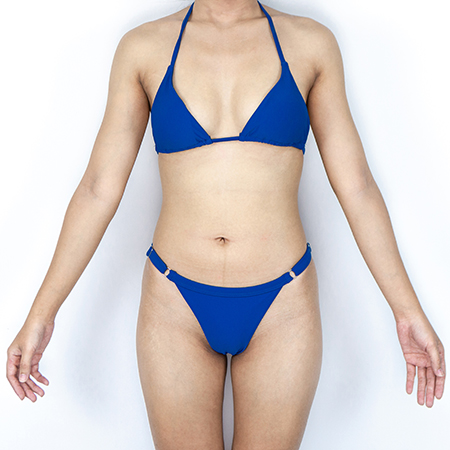 Photo 1: Front View
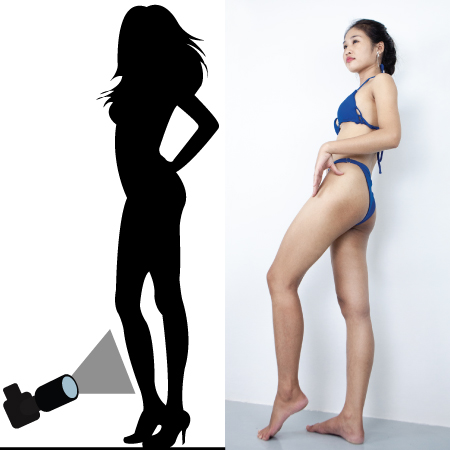
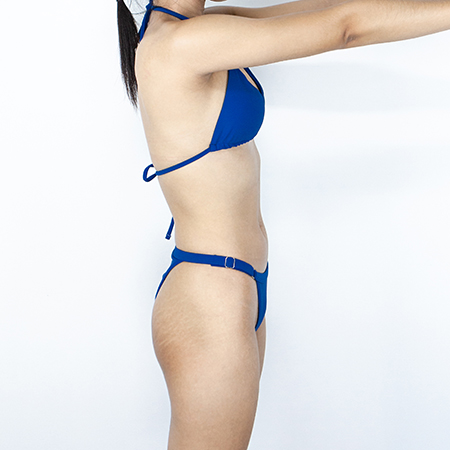 Photo 2: Side View
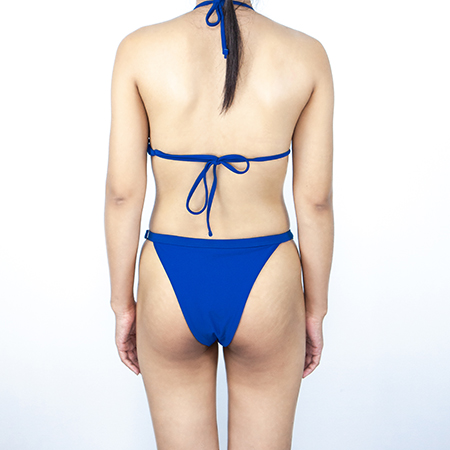
Photo 3: Back View
PRO TIP: Keep Camera Angle Balanced
The purpose of progress photos is to show us your overall look so that we can create the perfect suit for you. Avoid taking photos that will give us the wrong idea about what your body really looks like. Be most careful of camera perspective because high or low angles can make you look shorter, taller or top or bottom-heavy.
Low positioned camera angle creates an illusion of the short and smaller body with longer legs.
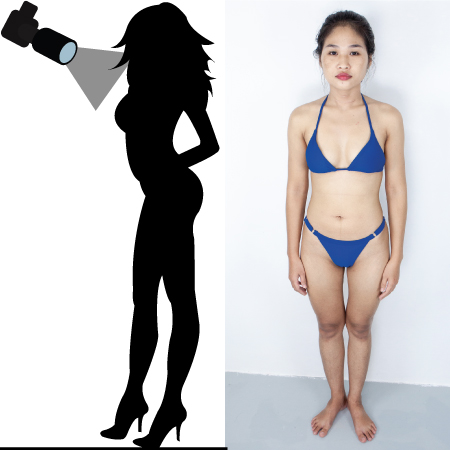
High positioned camera angle creates an illusion of big upper body and short legs.
No posing is necessary.
The 6 Measurements Photos
Please follow the instructions on how to take the measurements. make sure you check that the tape measure can be read clearly in each photo before sending them to us or we may have to ask you to re-measure again.
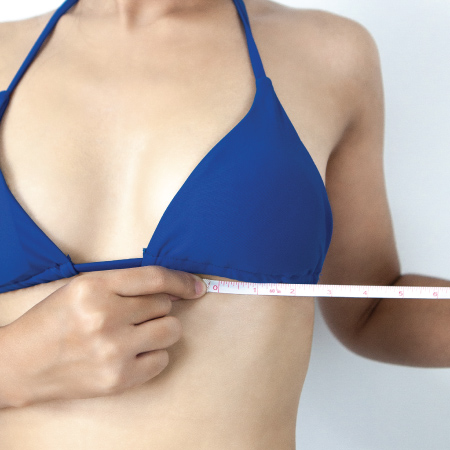
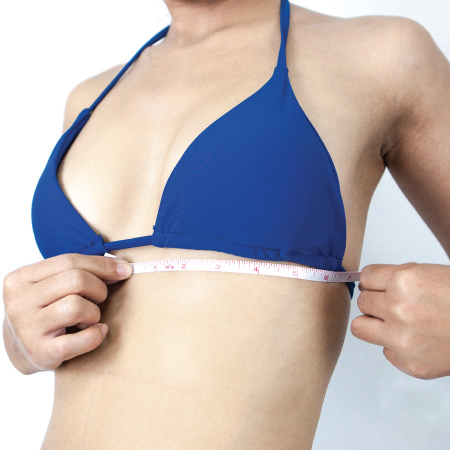 Photo 1: Bust Width
Place the tape horizontally on your body and just below the base of your bikini top. Make sure you hold the tape at least an inch away from the edge of the bikini top.
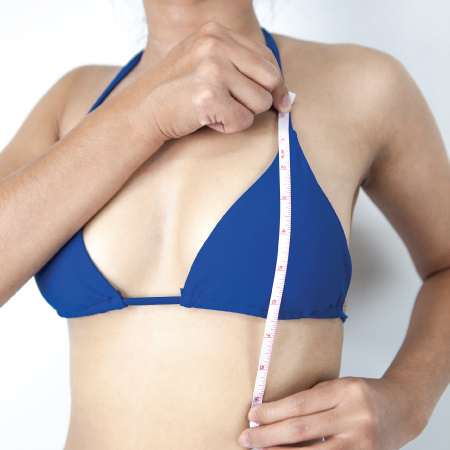 Photo 2: Bust Height
Place the tape vertically across the middle of your boob and along the surface and the curve of your boob. Then take the photo.
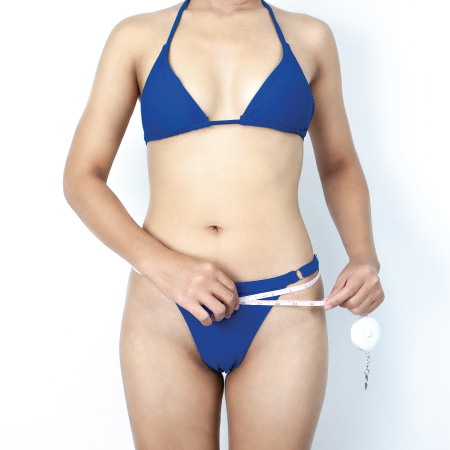
 Photo 3: Front View of Waistline Measurement
Place the tape right around your waist where your HIP BONES are. Make sure the tape is placed in the correct and in one position before taking this photo.
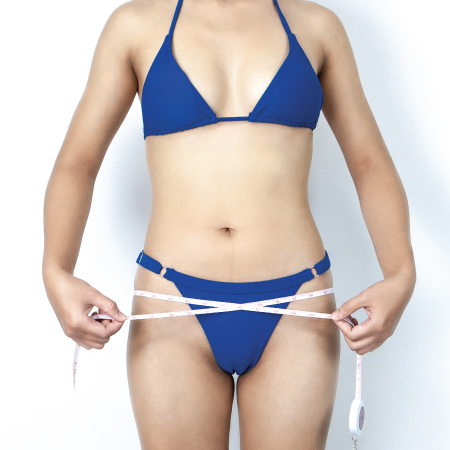
 Photo 4: Side View of Waistline Measurement
This photo is to ensure that the tape measure is sitting right across the hip bone height. Make sure the tape is placed in the correct and in one position before taking this photo.
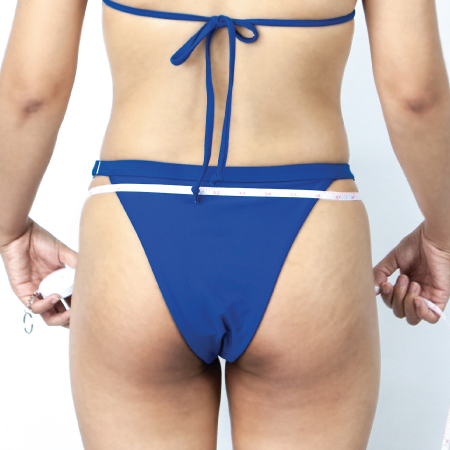 Photo 5: Back View of Waistline Measurement
This photo is to ensure that the tape measure is sitting right across the hip bone height. Make sure the tape is placed in the correct and in one position before taking this photo.
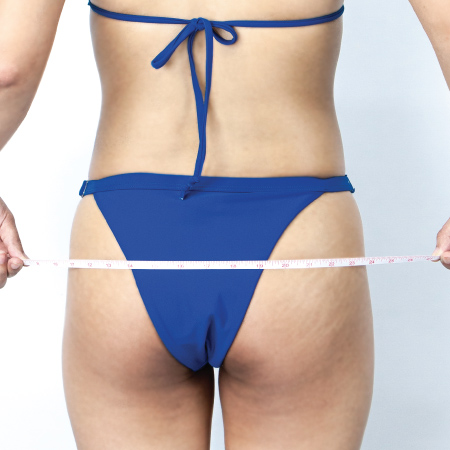 Photo 6: Back Coverage
This photo is used t determine how wide the back of the bikini bottom should be relative to the width of your hip and based on the type of bottom cut you chose.
Things to Avoid
Please make sure you place the tape exactly as per the instruction. Below are samples of incorrect placements of the measuring tape. This makes it difficult or impossible to read.
The tape measure is not placed across the entire width of the bikini base.

The tape measure is positioned too high on the waistline.
 The tape measure is too low and below the hip bone height.
The tape measure is placed too low and below the hip bone height.

Part of the tape measure is placed too high and above the hip bone height.
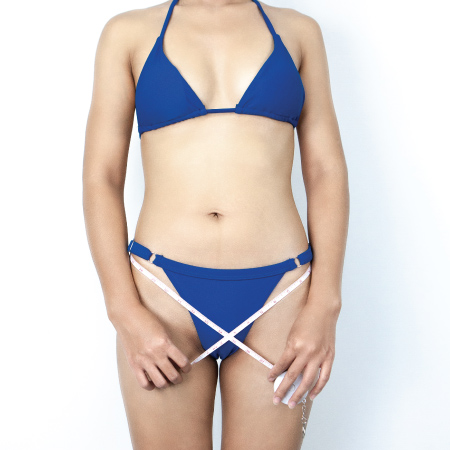
Holding the tape measure where the tape crisscrosses makes it impossible to read.